Every node in your workflow requires a tool to execute its objective. Tools determine what action the node performs, from processing data with AI to connecting with external systems.Documentation Index
Fetch the complete documentation index at: https://docs.beam.ai/llms.txt
Use this file to discover all available pages before exploring further.
Tools Within Nodes
When you add a node to your flow, you select a tool that defines the node’s behavior. The tool processes inputs from previous nodes and produces outputs for subsequent steps. Node-Tool Relationship:- One node = One tool assignment
- Tools can be reused across multiple nodes
- Each tool operates on defined inputs and outputs
- Tool type determines execution capabilities
Tool Types
Custom GPT Tools
AI-powered tools for classification, extraction, and intelligent processing
Integration Connectors
Pre-built connections to 1500+ external services and platforms
Custom Integrations
User-created API connections for proprietary or unlisted systems
Custom GPT Tools
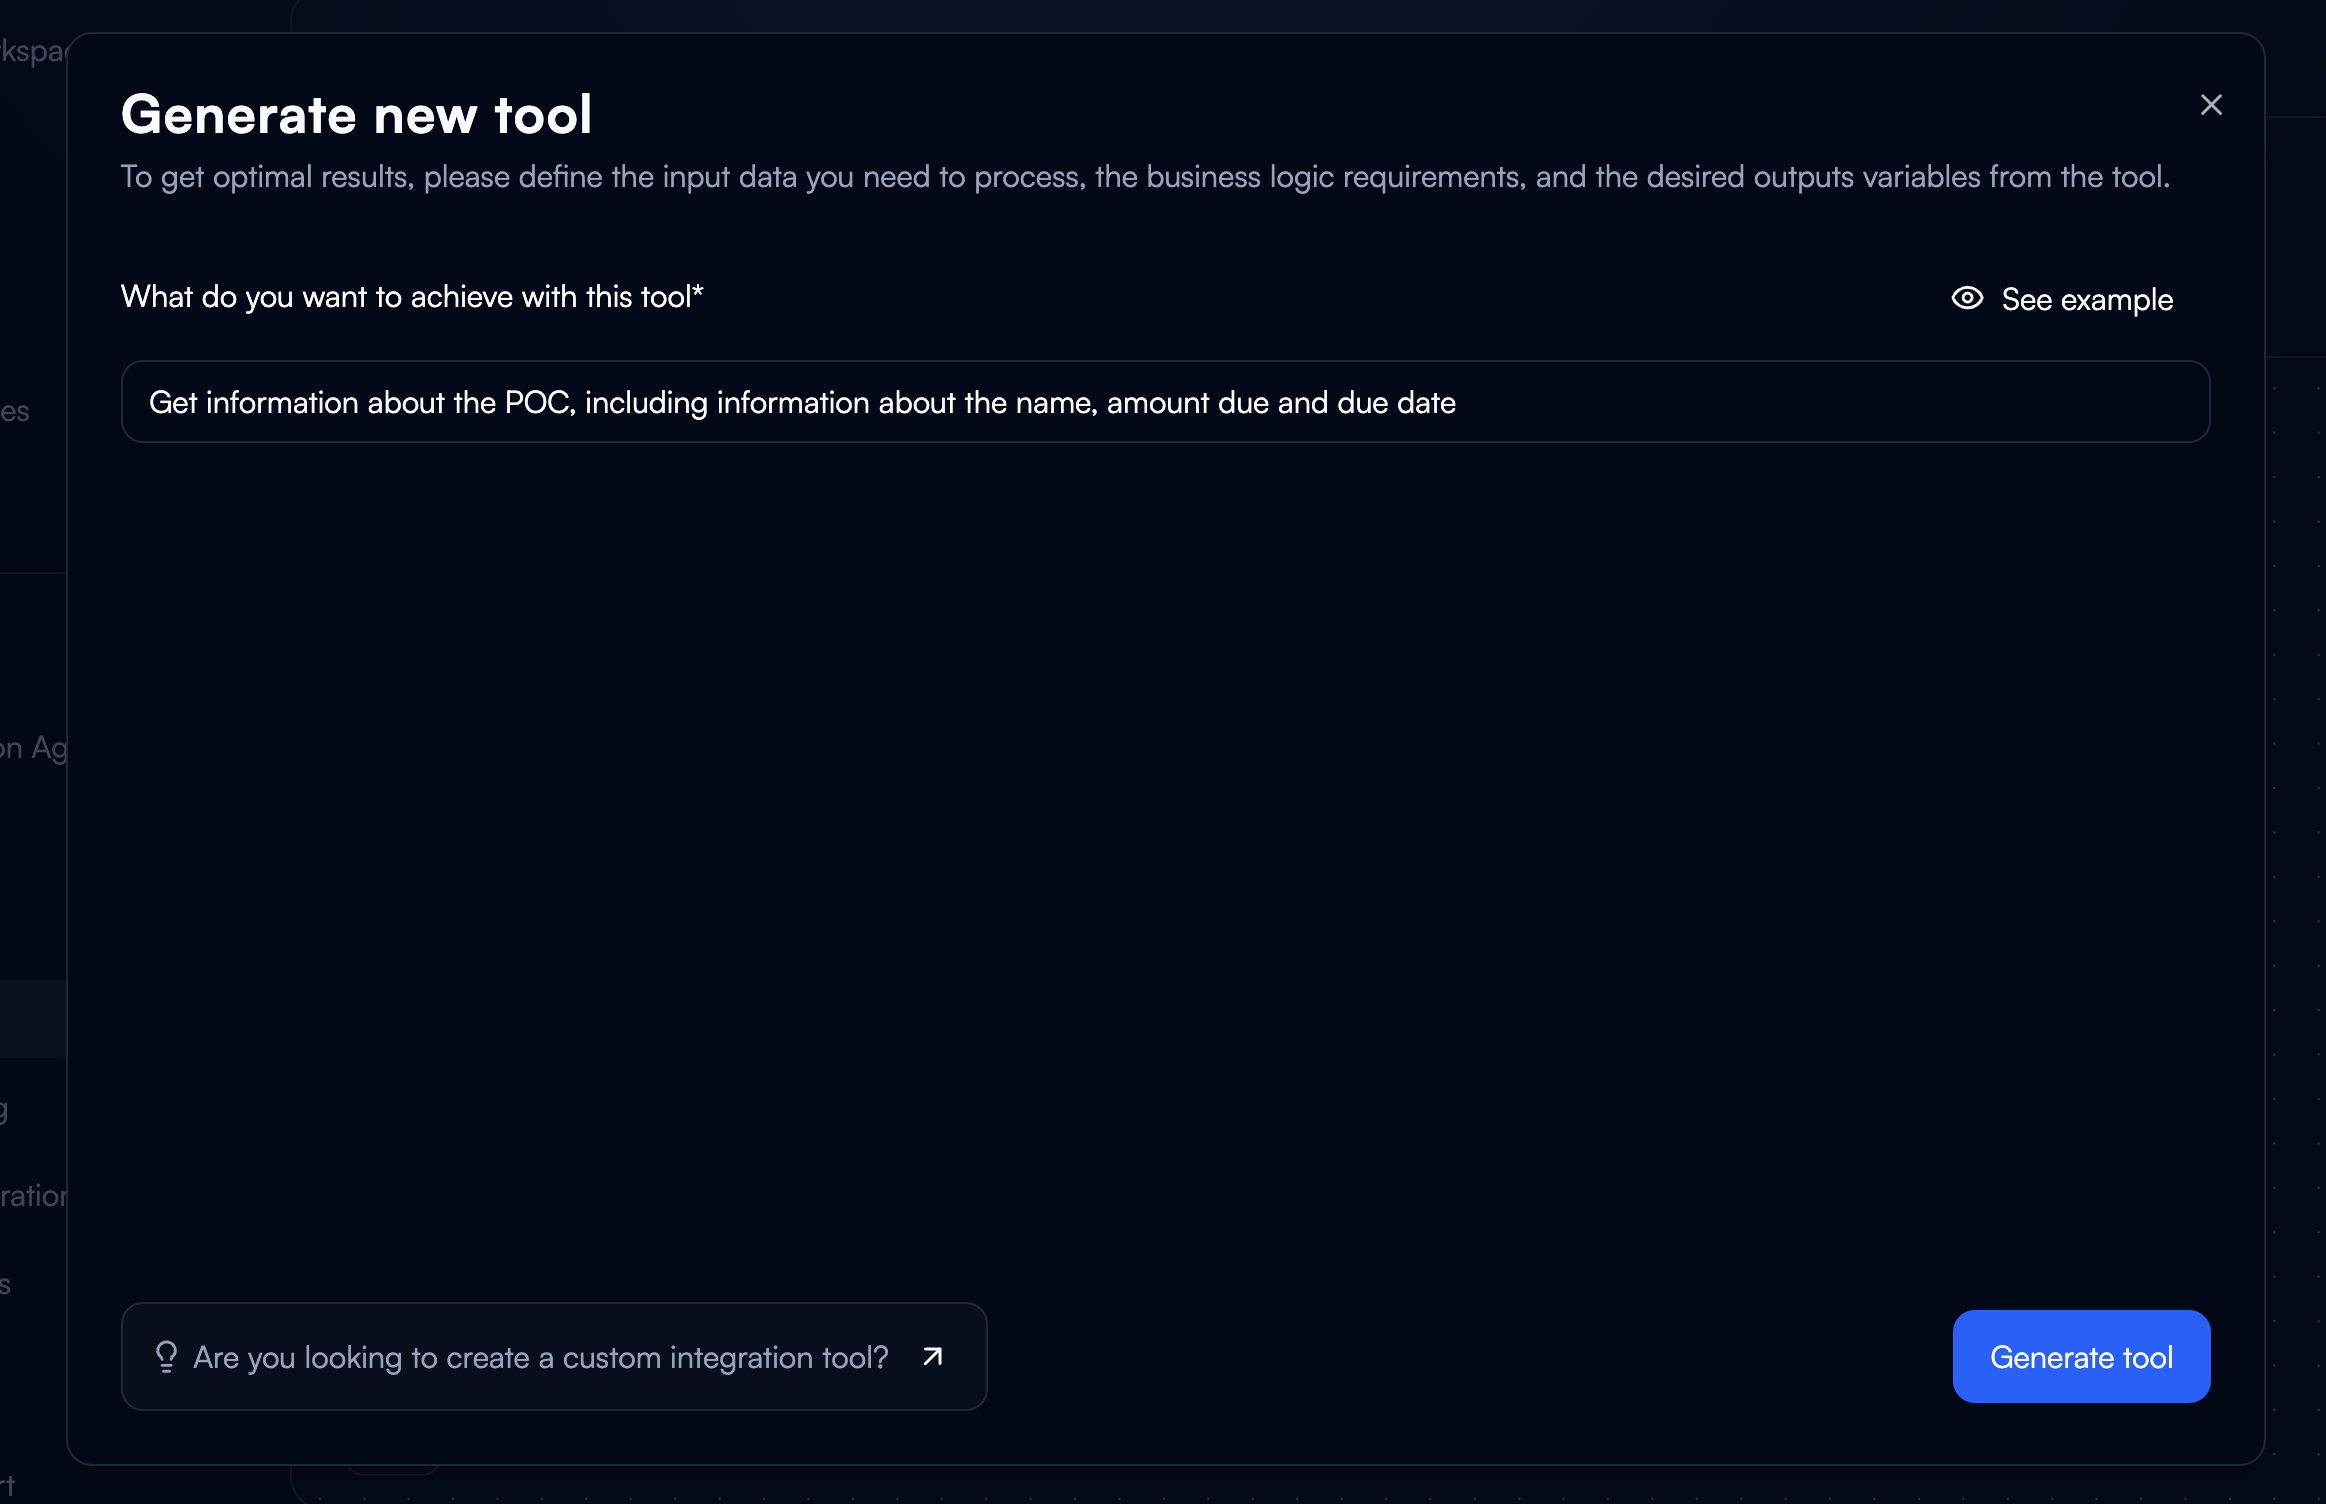
AI-powered tools that process data using language models. These tools analyze inputs and generate structured outputs based on your instructions.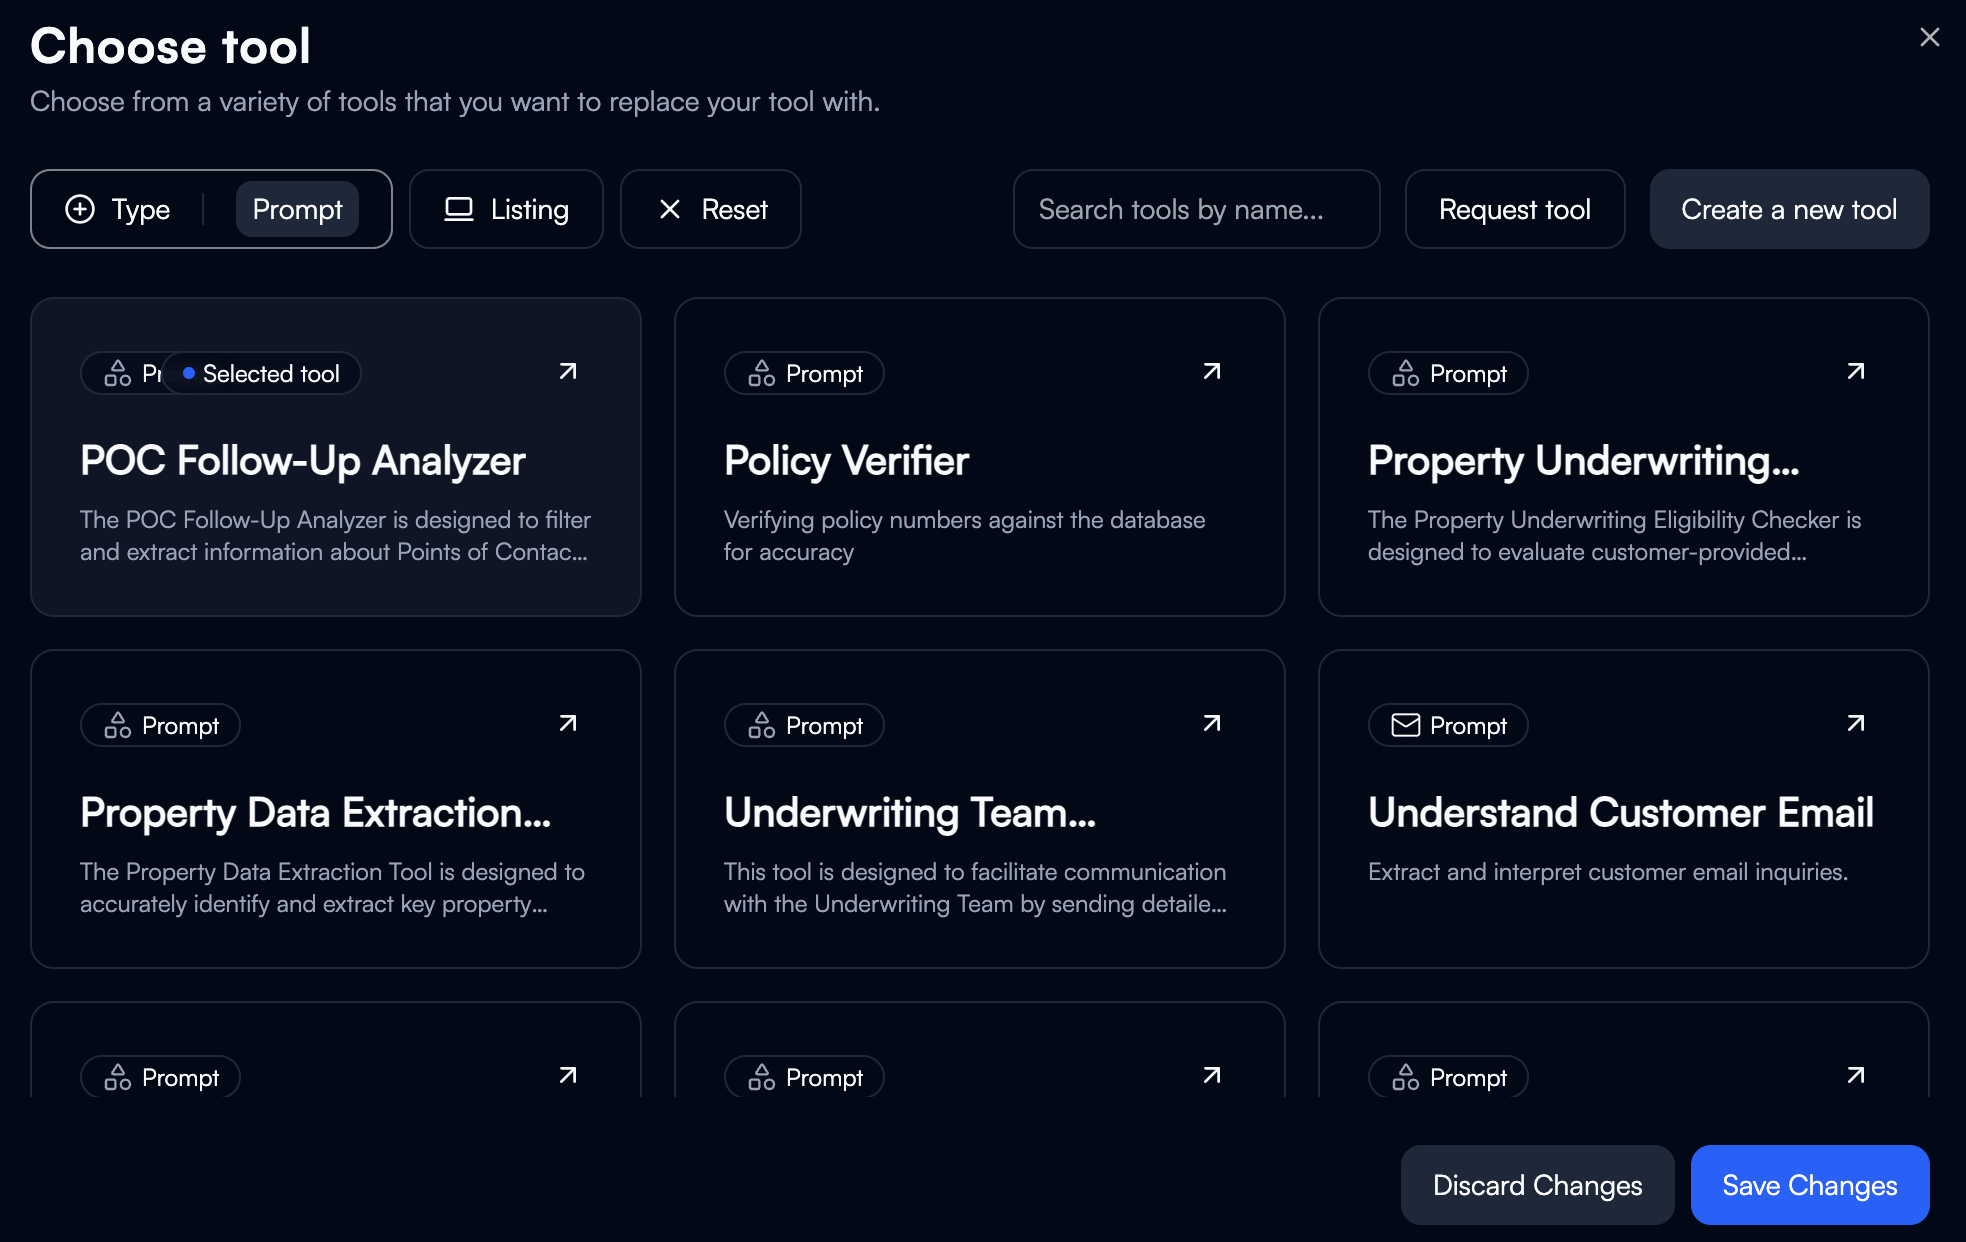
- Classify or categorize content
- Extract structured data from unstructured text
- Analyze sentiment or intent
- Generate responses or summaries
- Validate data quality
- You provide a prompt describing the task
- Tool receives inputs (text, documents, variables)
- AI model processes according to instructions
- Tool returns structured output
- Email classifier: Routes emails to departments based on content
- Invoice extractor: Pulls line items and totals from documents
- Support ticket analyzer: Determines priority and category
- Content validator: Checks completeness and accuracy
- Tool objective and description
- Input parameters (what data the tool receives)
- Processing prompt (instructions for the AI)
- Output schema (structure of results)
Integration Connectors
Pre-configured tools that connect to external platforms and services. Beam provides 1500+ ready-to-use integrations.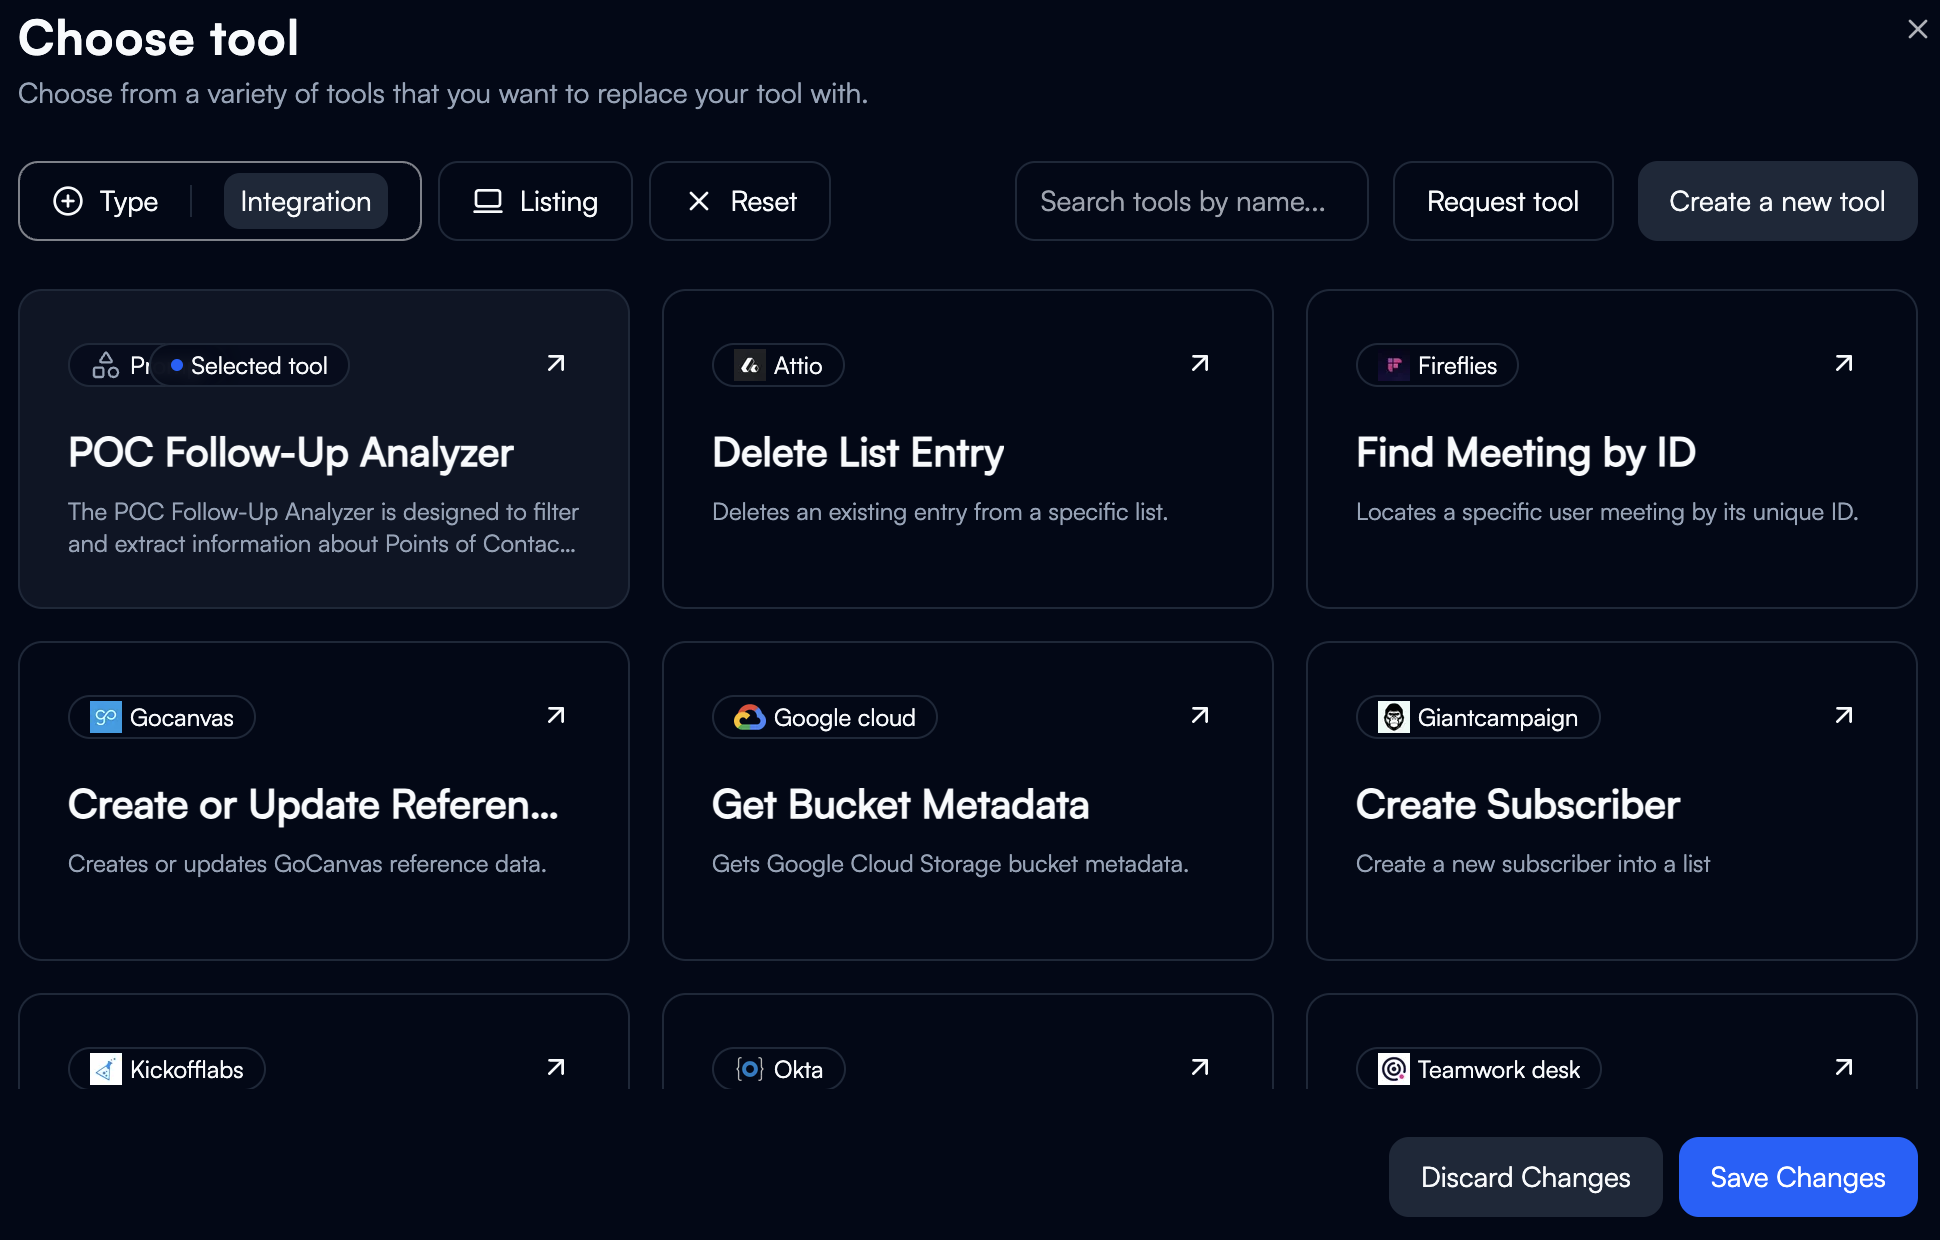
- Gmail: Send/receive emails, manage labels, search messages
- Outlook: Email operations, calendar management
- Slack: Post messages, manage channels, file sharing
- Salesforce: Lead management, opportunity tracking, record updates
- HubSpot: Contact operations, deal management
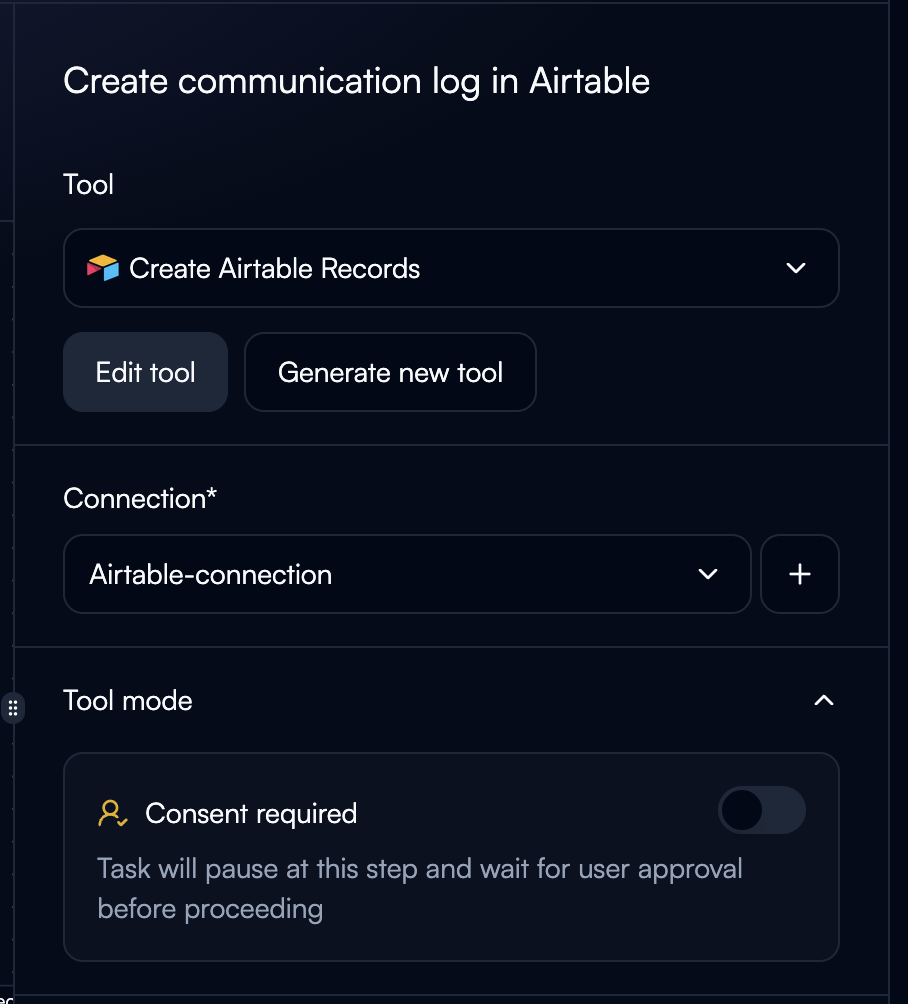
- Airtable: Database queries, record creation, updates
- Google Drive: File management, sharing, search
- SharePoint: Document operations, list management
- Notion: Database operations, page creation
- SAP: ERP operations, data retrieval
- NetSuite: Financial operations, record management
- Oracle: Database queries, business logic
- Select service from integration catalog
- Authenticate (OAuth, API key, or custom method)
- Choose specific action (send email, create record, etc.)
- Map workflow variables to integration fields
- Tool executes action when node runs
- Action: Send email via Gmail
- Inputs: Recipient, subject, body, attachments
- Authentication: OAuth connection to Gmail account
- Output: Confirmation of sent message
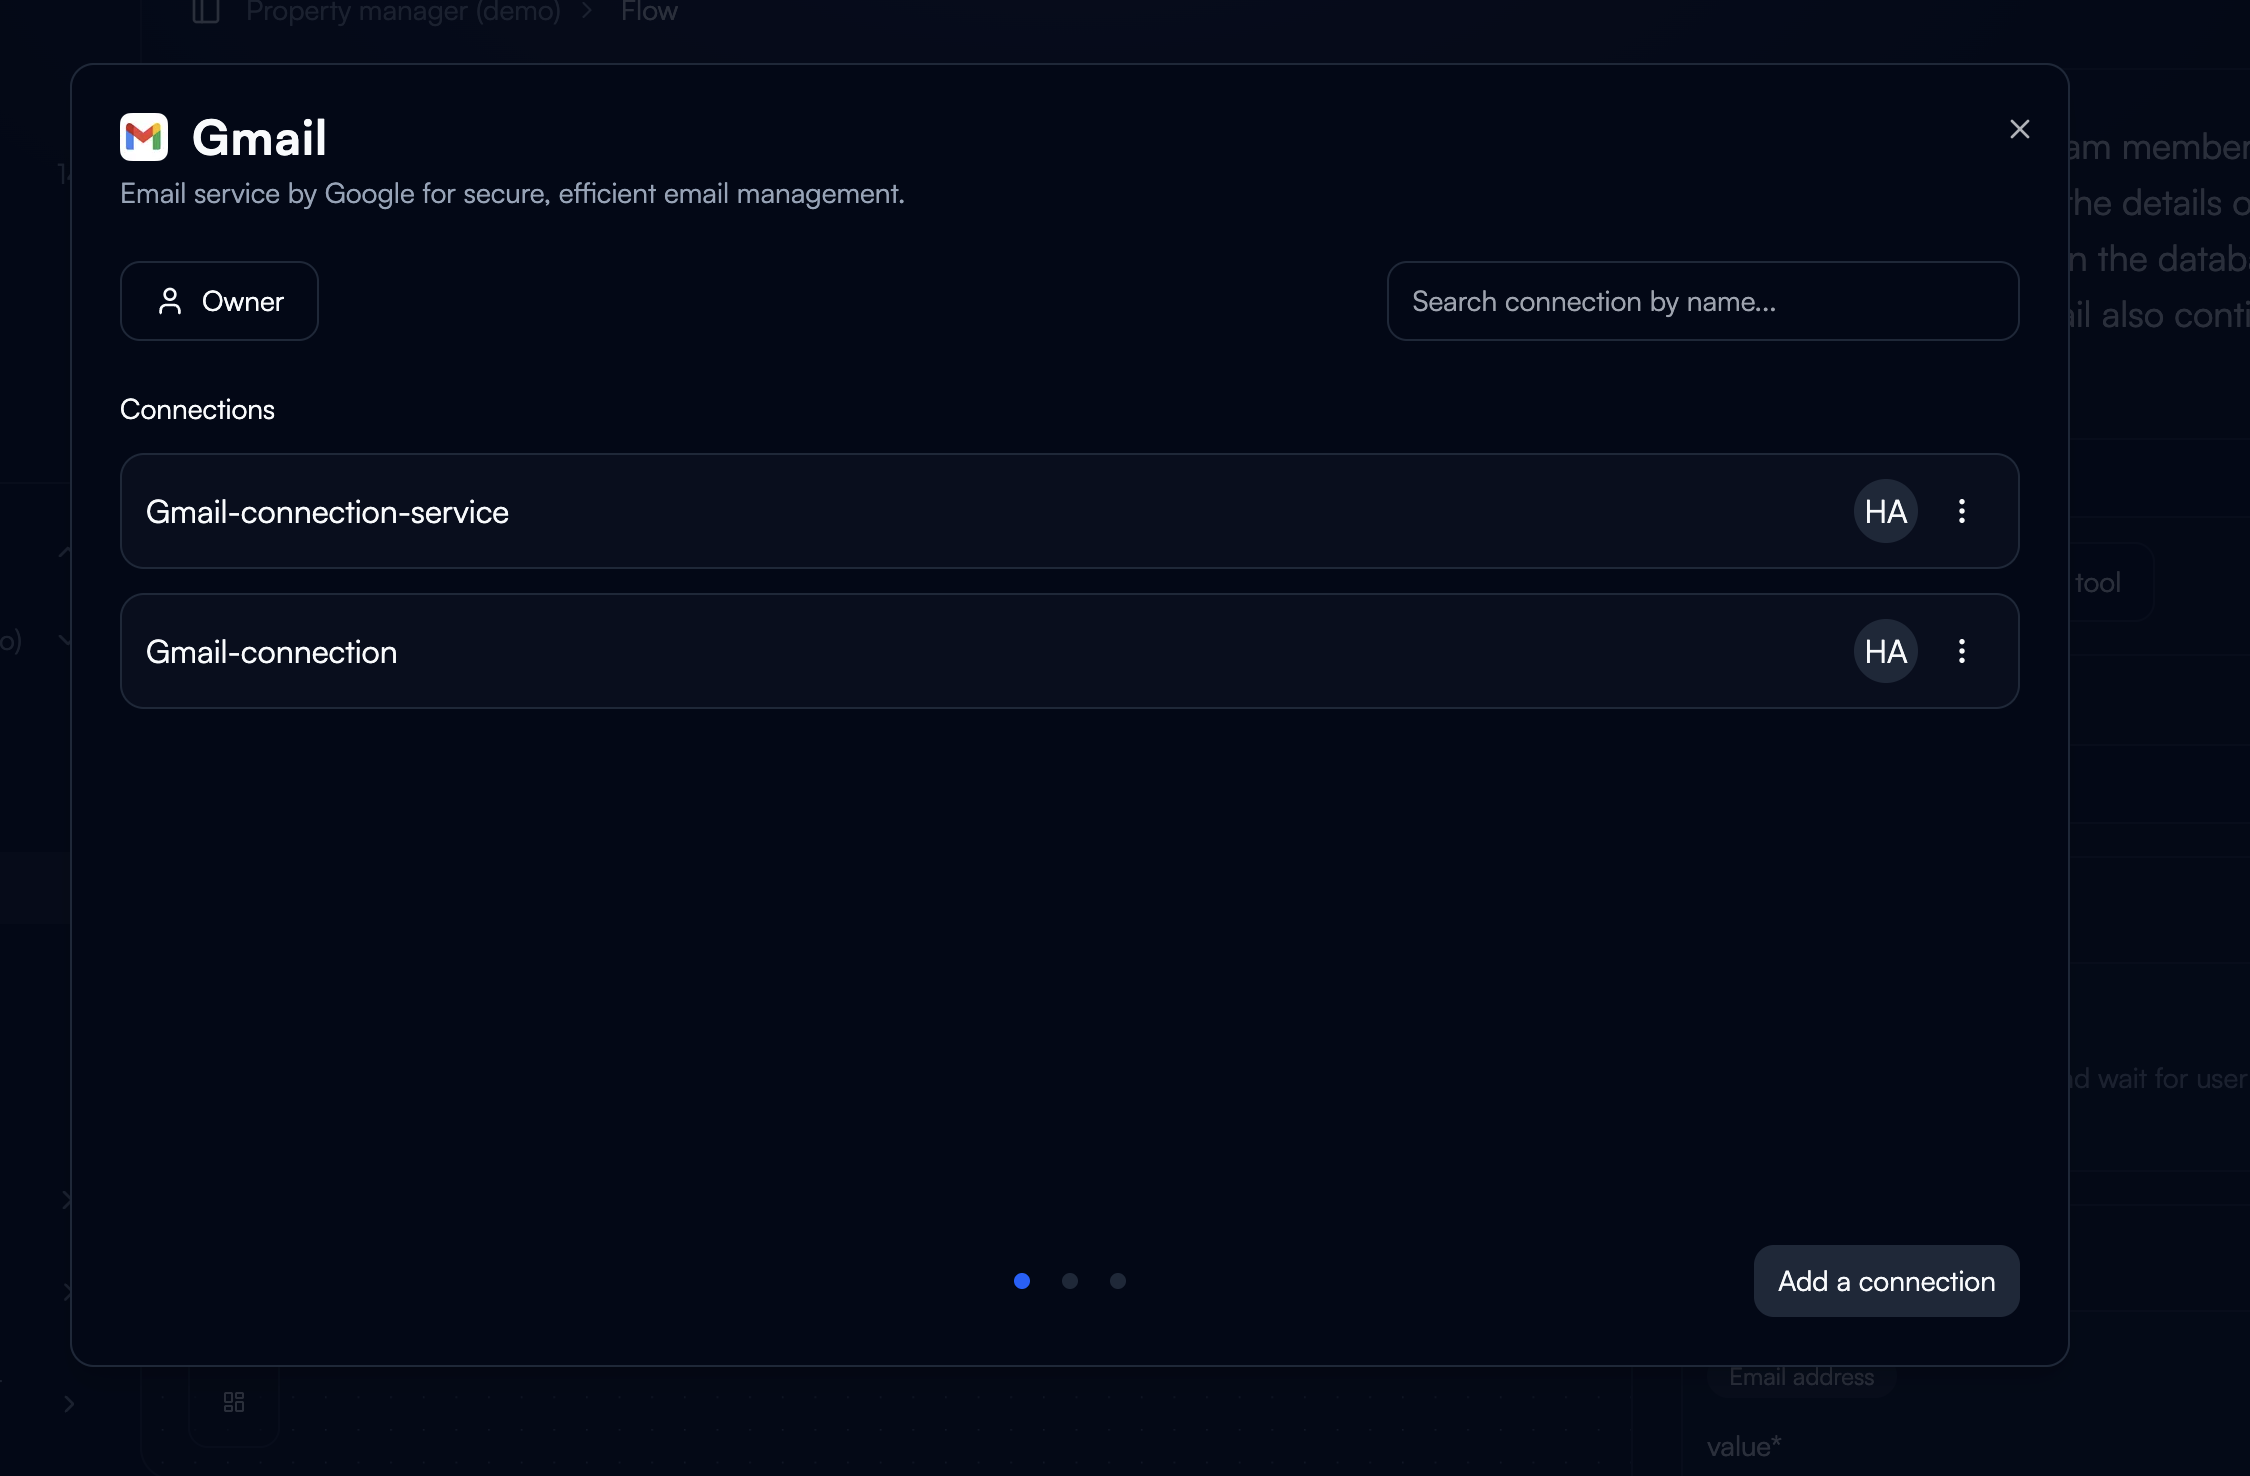
Multi-Connections for Integrations
Many integrations support multiple connections to the same service. This allows you to:- Connect multiple accounts (e.g., multiple Gmail accounts)
- Use different credentials for different workflows
- Separate personal and business accounts
- Test with staging vs production environments
Add Connection
When configuring an integration tool:
- Click “Add Connection” or “Connect Account”
- Authenticate with the service
- Give the connection a descriptive name
Select Connection
When using the tool in a workflow: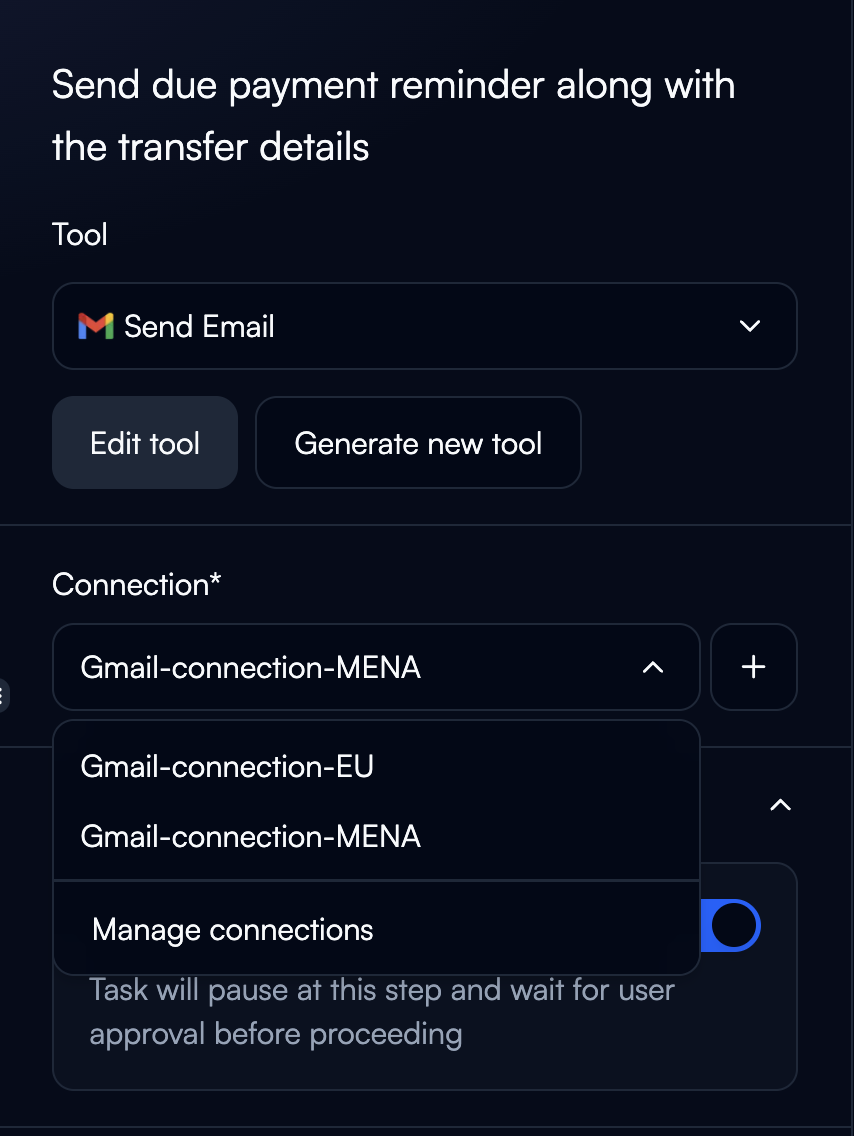
- Choose which connection to use from dropdown
- Different nodes can use different connections
- Switch connections without reconfiguring the tool
- Multiple Email Accounts: Send from support@company.com or sales@company.com
- Multi-Tenant CRM: Connect different Salesforce orgs for different clients
- Environment Separation: Staging Airtable base vs Production base
- Team Separation: Marketing Gmail vs Customer Support Gmail
Custom Integrations
Build your own API connections for services not available in the integration catalog. See detailed instructions in Advanced Patterns → Custom Integrations. When to Build Custom Integrations:- Proprietary internal systems
- Specialized industry platforms
- Services not in catalog
- Custom authentication requirements
- Provide OpenAPI specification or API documentation
- Configure authentication method
- Define available actions and endpoints
- Map request/response structures
- Test connection and actions

- API base URL
- Authentication type (API key, OAuth, bearer token, custom)
- Endpoint definitions
- Request/response schemas
- Error handling rules
- System: Internal customer database
- Endpoints: Create contact, update deal, retrieve account
- Auth: Custom API key header
- Actions: POST /contacts, PATCH /deals/:id, GET /accounts/:id
Selecting the Right Tool
Choose tool type based on your node’s objective: Decision Framework:| Node Objective | Tool Type | Specific Tool |
|---|---|---|
| Classify incoming email | Custom GPT | Email Classifier |
| Send notification to Slack | Integration Connector | Slack - Post Message |
| Retrieve customer data from CRM | Integration Connector | Salesforce - Query Records |
| Extract invoice line items | Custom GPT | Invoice Data Extractor |
| Update internal system | Custom Integration | Internal API - Update Record |
| Validate data completeness | Custom GPT | Data Validation Tool |
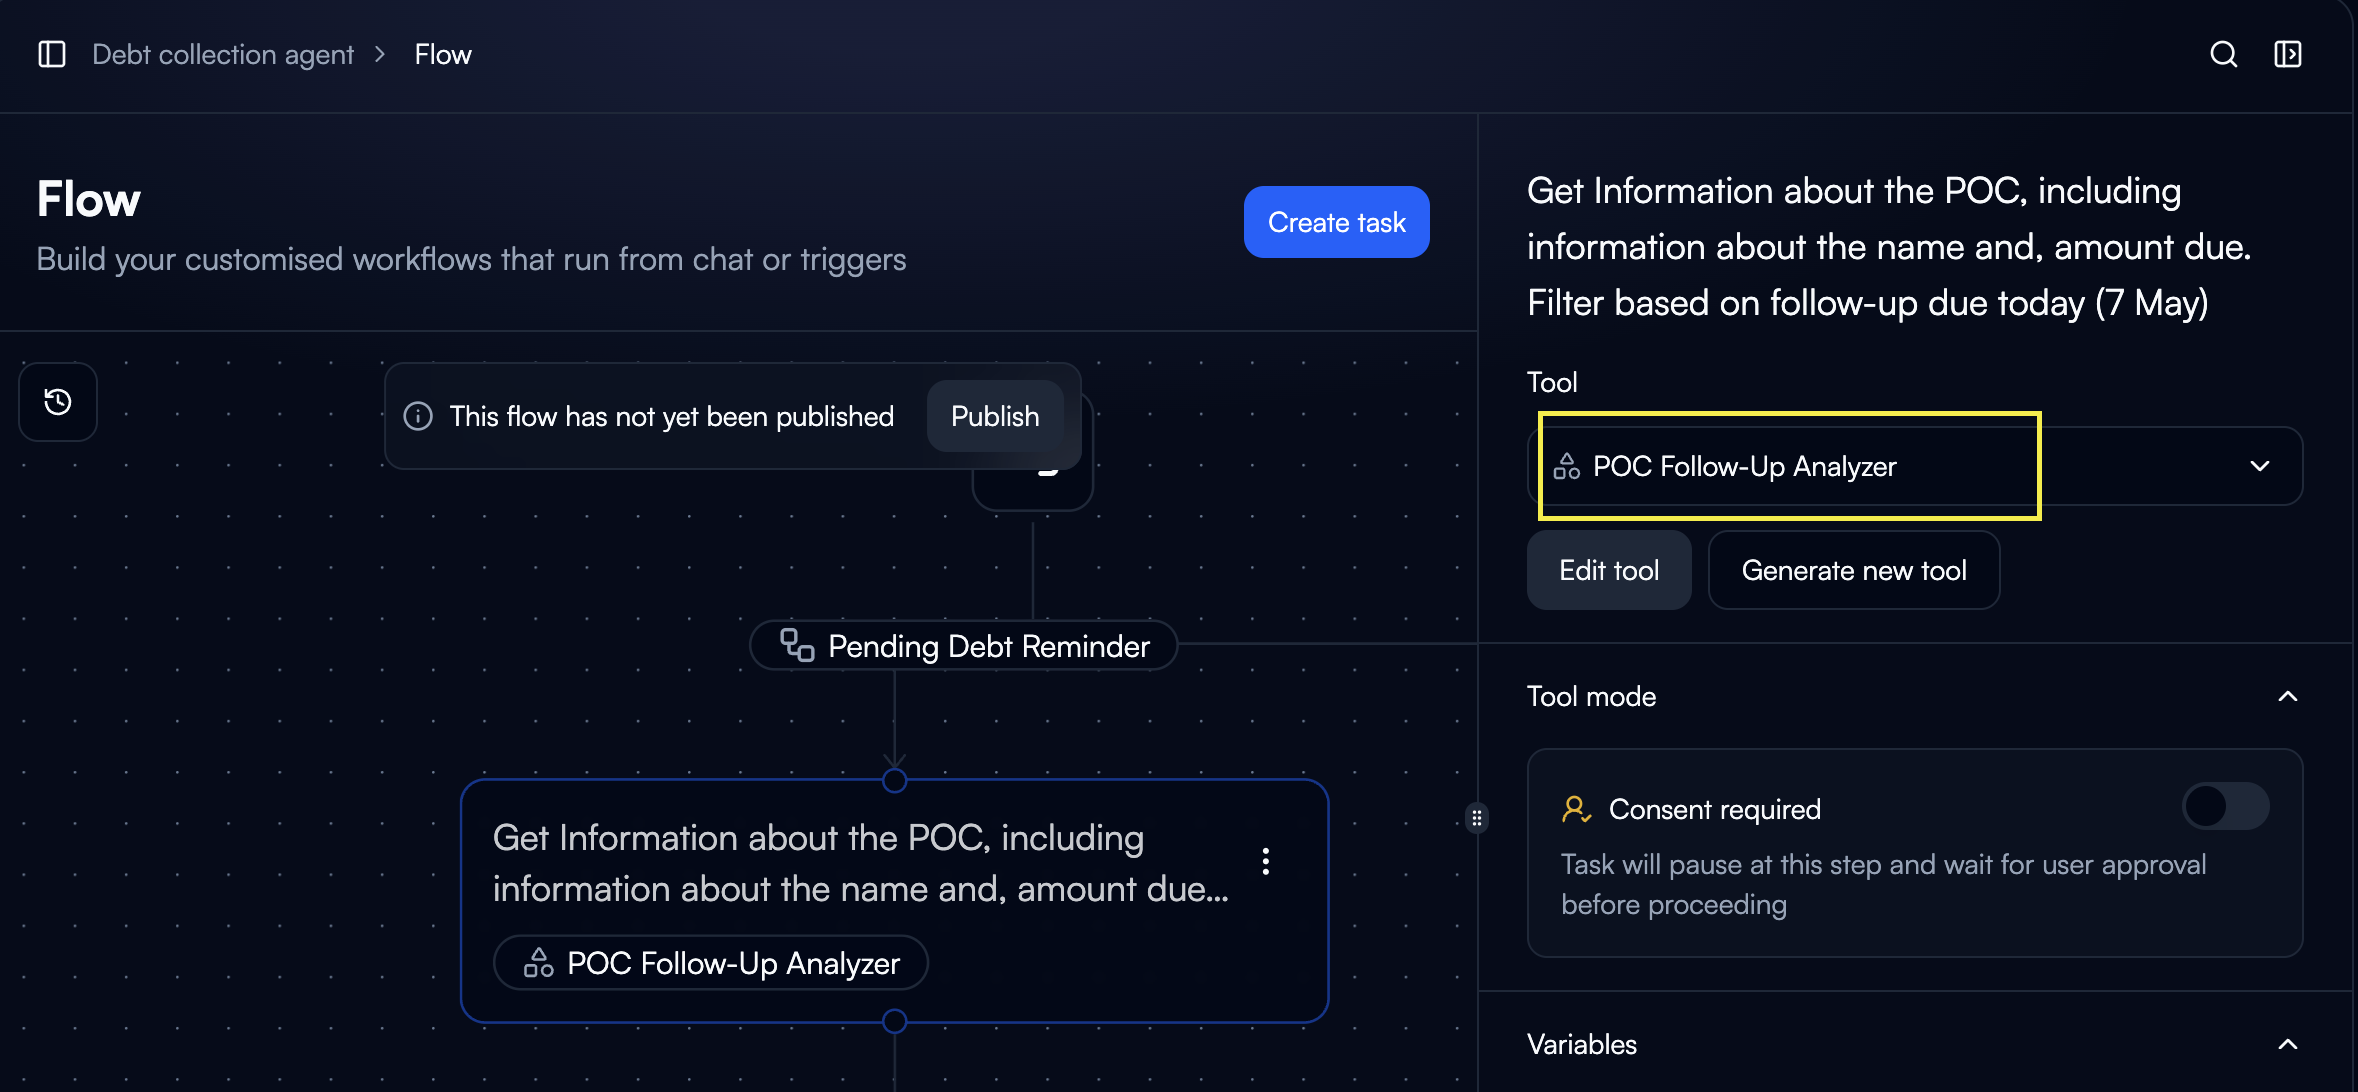
Adding Tools to Nodes
Browse Tool Gallery
Click the tool dropdown to access the Tool Gallery with smart filtering:Filter Options:
- All Tools: See every available tool
- Integrations: Filter to show only integration connectors
- Prompts: Filter to show only Custom GPT tools
- Recent: Your recently used tools
- Search: Find tools by name or functionality
- Select “Integrations” to see only Salesforce, Gmail, Airtable, etc.
- Select “Prompts” to see only AI-powered processing tools
- Search “email” to find all email-related tools across types
Select or Create Tool
Option A: Use Existing Tool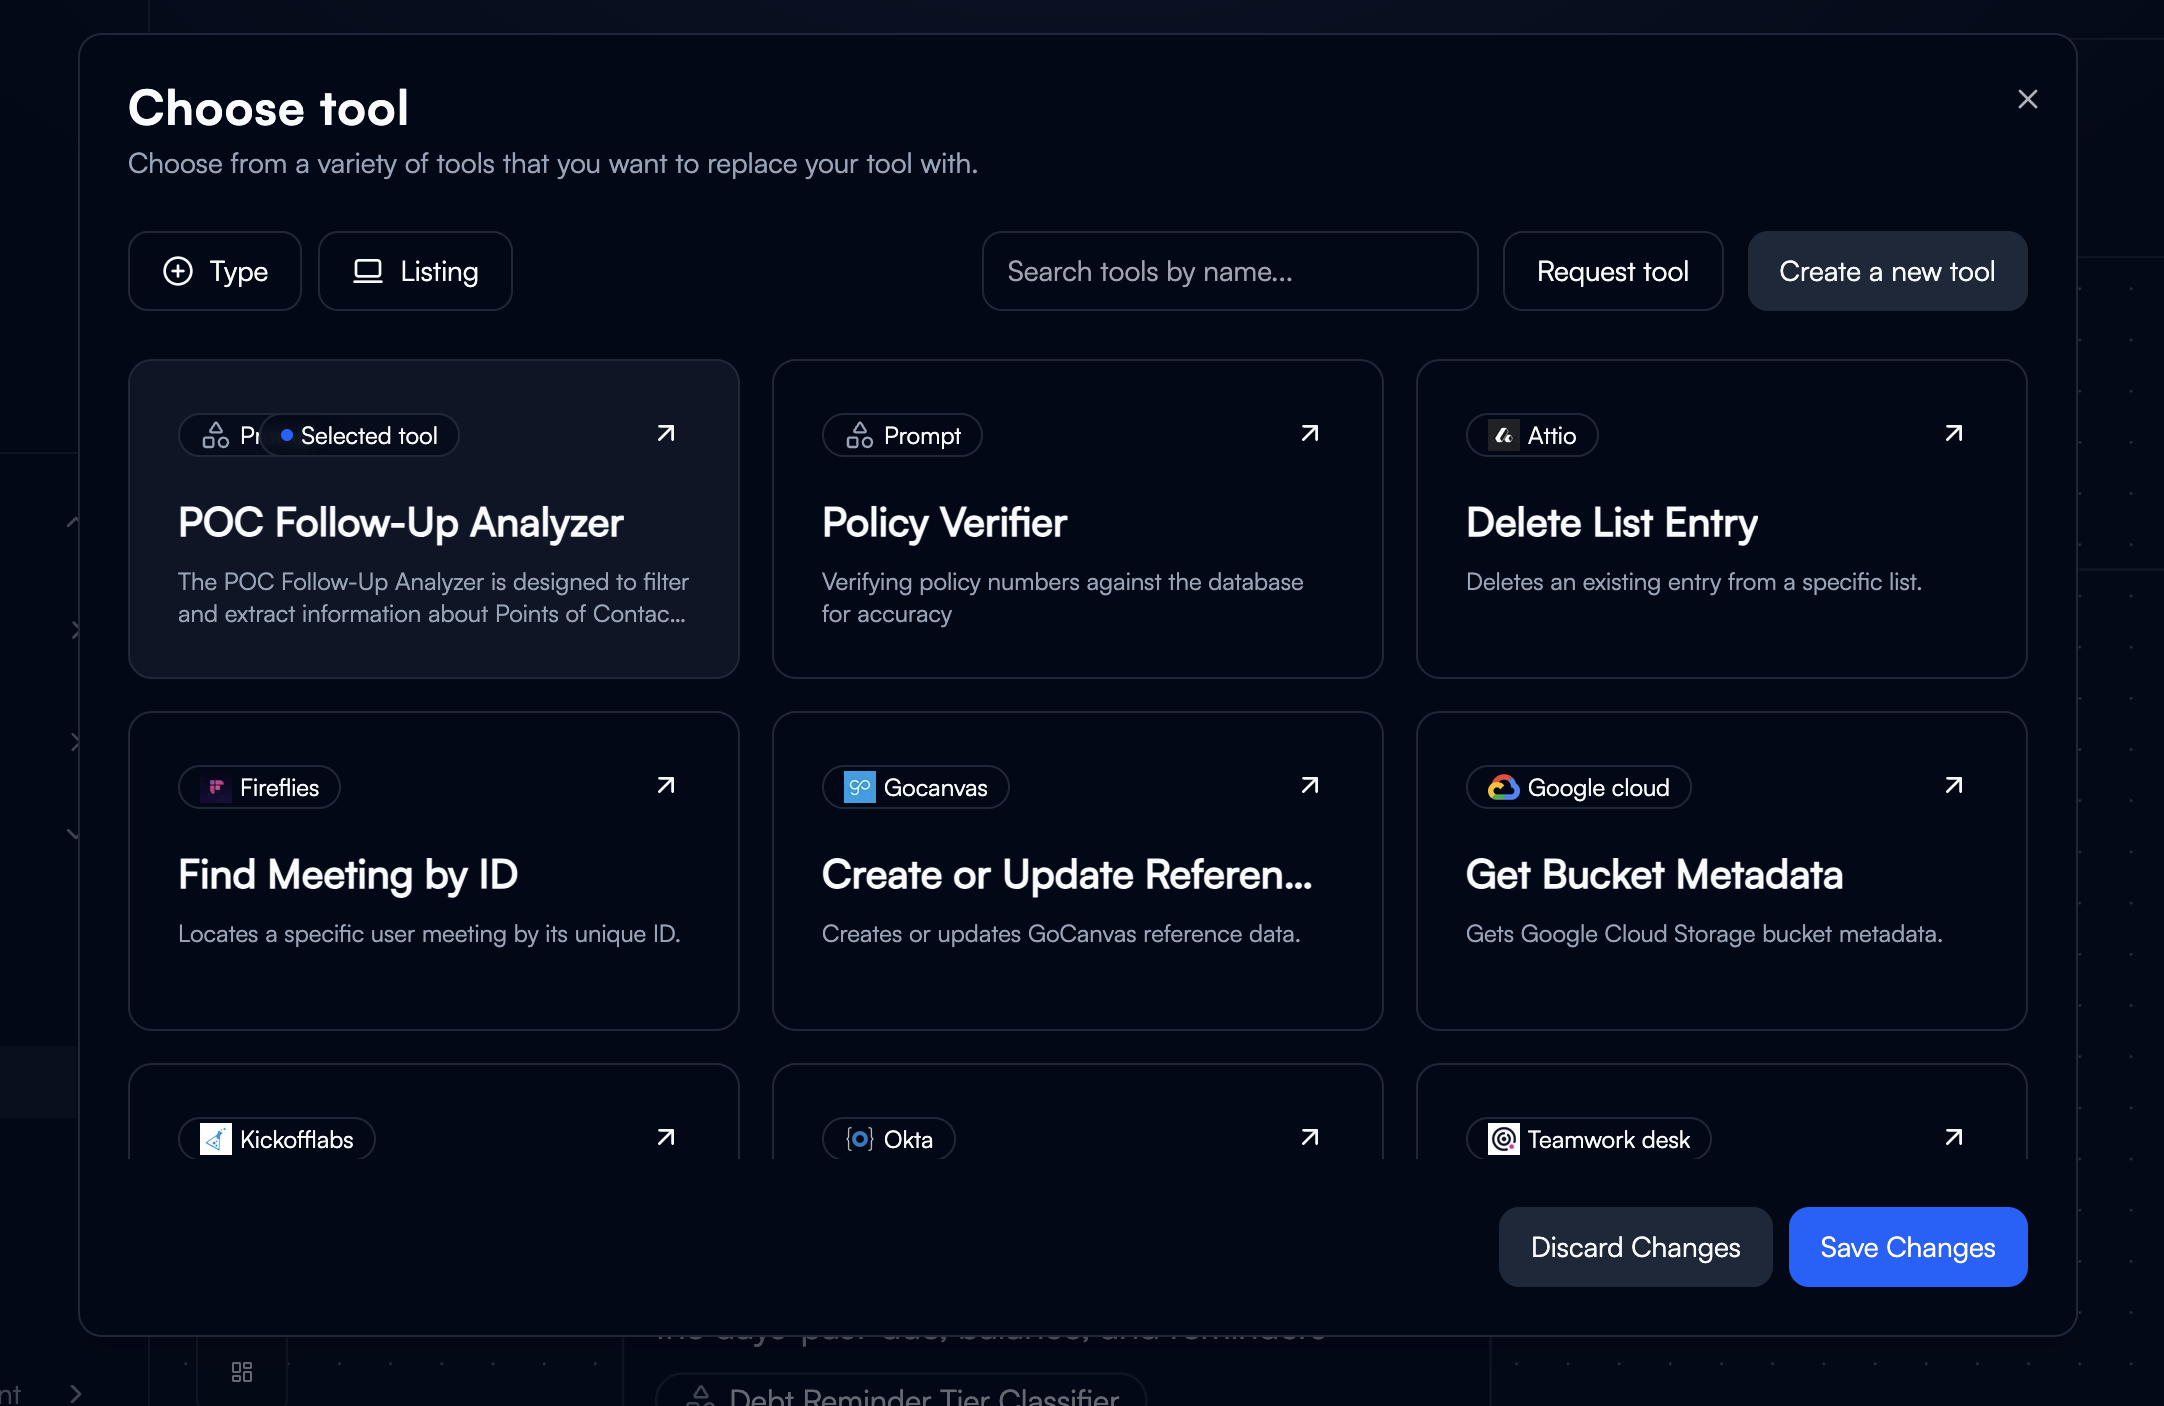
- Browse the filtered gallery
- Preview tool capabilities
- Select tool to assign to node
Tool Execution Modes
Control how tools execute within nodes: Fully Automated- Tool runs without human intervention
- Best for: High-confidence, repetitive tasks
- Fastest workflow execution
- Example: Data formatting, simple classification
- Workflow pauses for user approval before tool executes
- Human-in-the-loop validation
- Best for: Critical operations, external communications
- Example: Sending emails, financial transactions
- Enable Code Interpreter for programmatic task execution
- Dynamically writes and executes code to deliver responses
- Best for: Mathematical calculations, data manipulation, aggregation, searching, and sorting
- Provides more accurate results for computational tasks
- Not ideal for textual or conceptual data where LLM context-awareness excels
Changing Tools
Replace or modify tools assigned to nodes: Change Tool in Node:- Open node configuration
- Click “Change Tool”
- Select different tool from list
- Remap input/output variables if needed
- Save configuration
- Original tool not providing desired results
- Need different processing approach
- Switching between test and production tools
- Optimizing for speed or accuracy
Tool Libraries
Organize and manage your tools: Workspace Tools:- All custom GPT tools created in your workspace
- Shared across all agents and workflows
- Searchable by name, category, or description
- Browse 1500+ pre-built connectors
- Filter by category or search by name
- View available actions for each service
- Favorite frequently used tools
- Quick access from node configuration
- Organize by project or use case
Best Practices
Tool Selection:- Start with integration connectors for standard services
- Use Custom GPT for AI-powered processing
- Build custom integrations only when necessary
- Reuse tools across nodes for consistency
- Use clear, descriptive tool names
- Categorize tools by function or department
- Document tool purpose and configuration
- Maintain tool library hygiene (archive unused tools)
- Match tool capability to task complexity
- Enable code execution for computational tasks
- Enable consent for critical operations only
- Monitor tool execution times and costs
Next Steps
Variables & State
Configure how data flows into and out of tools
Integration Connectors
Deep dive: Configure integration connectors and multi-connection patterns
Custom Integrations
Build custom API connections for proprietary systems
Structured Outputs
Design JSON schemas for predictable tool outputs